Learning new tech through the #TwoPointSixChallenge
Challenge summary
To get the whole story, you'd be best reading my Part-time on Wheels blog. In this post, I want to share about some of the techie things I learned or did for the first time, whilst making our video. I used a rather old Sony HD camcorder and various bits of the Adobe Creative Cloud. Hopefully, this will be useful to somebody.
Adobe Illustrator
I was watching one of the Spring Harvest videos over Easter and they had a cool frame around the film clip. I liked the effect and wanted to give that a try. So I used Illustrator to create a frame. The cool thing with Adobe, is that you don't even have to export it. You can just drag the Illustrator file onto the Premiere Pro timeline and they play very nicely together. This was handy, as I decided to change the frame several times before finally settling on this one:
Adobe Media Encoder
My old but trusty Sony camcorder produces all the video files in MTS format, which isn't accepted by Premiere Pro, but luckily, Media Encoder very easily converts them into MP4, which is what I wanted. You just drag and drop the files onto the queue window and press play. Then, when it's done, a little green tick appears. Dead easy!
Adobe Premiere Pro
I have to confess, to my embarrassment, that for most of my video editing life, I've been a solid fan of Windows Movie Maker. I just couldn't get to grips with any other editing software.
So recently, I decided I must learn Premiere Pro (and After Effects) and I used various YouTube courses to get me started. I particularly recommend Gareth David Studios' channel.
I've used Premiere Pro a couple of times, but really just very very basic stuff to get rid of bits that I didn't want.
I've used Premiere Pro a couple of times, but really just very very basic stuff to get rid of bits that I didn't want.
I used the razor tool to cut video clips at a specific point and to remove the parts I didn't want. Actually, because the video was time limited to 2.6 minutes, I had to take out quite a lot that I really did want to keep too.
For those that haven't used it before, you click on the razor icon (shown left) and then carefully place the mouse over the video timeline, where you want to cut the film in two, and click. If you then do the same in another place, you can select the 'select' tool (the blue arrow on the left) and then highlight the section you want to delete and hit the delete key.
You can also then drag the clips along the timeline and they generally snap together so that the timing works perfectly. By doing this over and over, you can choose the exact sections you want, move them around, reorder them, etc.
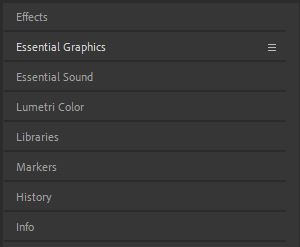
Another thing I did for the first time in Premiere Pro, was to have a good look at the Essential Graphics. This is where you can add titles, captions, credits, etc.
There are loads of pre-made graphics to choose from. Of course, if you know what you're doing, you can make your own, but I chose from the ones available and then edited them.
To use a graphic, you drag it from the menu, onto the timeline. Then you can preview it, stop and edit any part of it, and move it into exactly the right position.
I change the font and background colour on most of them, and used the editing panel on the right, to get it just the way I wanted it.
To use a graphic, you drag it from the menu, onto the timeline. Then you can preview it, stop and edit any part of it, and move it into exactly the right position.
I change the font and background colour on most of them, and used the editing panel on the right, to get it just the way I wanted it.
The finished product
When I was happy with the video and all the graphics, I exported it to an avi file and then uploaded it to YouTube. One of the great things with YouTube, is that it helps you with adding closed captions. If you've read any of my previous posts, you'll know I am passionate about making sure everything is accessible. If there is speech in your video, a person with a hearing impairment will not be able to access it. If you've set up closed captions, however, they'll be able to read what is being said... which is great!
So, here is the finished video. It's not great or professional. I was doing it alongside working full time and trying to keep my household sane. I'm happy that it shows my girl doing her thing though.


Comments
Post a Comment